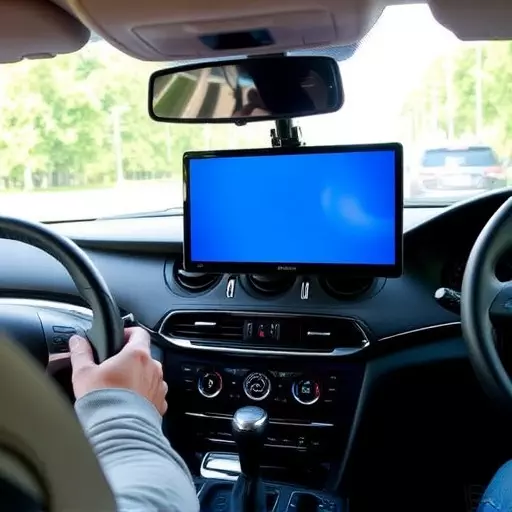
In-dash video setups, offering immersive driving experiences with high-definition displays, have gained popularity among car enthusiasts. When installing one in Toledo, DIY or professionally, it's crucial to understand key components like display size, screen technologies, and features such as navigation and Bluetooth connectivity. Choosing the right setup enhances your driving experience, with premium installations providing 4K resolutions, smartphone integration, and diverse multimedia support.
DIY installations save costs but require specific knowledge and tools, while professionals offer peace of mind, expert handling, and optimal system performance at a higher cost. Successful DIY installations involve planning, measuring dashboard space, cleaning the dashboard, removing old equipment, and routing cables securely. However, challenges like compatibility issues and proper fitting may arise, necessitating detailed research and precise tools.
Regular maintenance is key to longevity; DIY owners should clean components, inspect connections, and update firmware, while professionals offer tailored solutions, secure mounting, and knowledge of the latest technology. Ultimately, whether DIY or professional, the best in-dash video setup enhances vehicular entertainment and connectivity.
Are you ready to transform your car into a mobile entertainment hub? Premium in-dash video setups offer an immersive viewing experience, bringing your drive to life. This comprehensive guide delves into the world of in-dash videos, from understanding the basics to choosing the right equipment and navigating DIY vs professional installations. Learn about the benefits, potential challenges, and maintenance tips for a lasting setup that caters to your unique needs, whether it’s for leisure or business, in the comfort of your Toledo vehicle.
- Understanding In-Dash Video Setups: A Comprehensive Overview
- Benefits of a Premium In-Dash Video Installation
- DIY vs Professional: Weighing Your Options
- Choosing the Right Equipment for Your Vehicle
- Step-by-Step Guide to Installing an In-Dash Video System (DIY)
- Common Challenges and How to Overcome Them
- Maintenance and Upgrades: Ensuring Longevity of Your Setup
Understanding In-Dash Video Setups: A Comprehensive Overview
In-dash video setups have become a popular feature among car enthusiasts, offering an immersive and entertainment-focused driving experience. These systems typically include a high-definition display installed in place of or alongside the traditional dashboard instruments. The process of integrating such a setup varies from simple DIY installations for those with technical prowess to complex professional jobs that cater to more intricate requirements.
For those considering an in-dash video installation Toledo, whether it’s a DIY project or a professional service, understanding the components and options is key. This includes selecting the appropriate display size, choosing between various screen technologies, and deciding on additional features like navigation, Bluetooth connectivity, and multimedia playback. A comprehensive overview ensures that car owners make informed decisions, ultimately enhancing their driving experience with a premium in-dash video setup tailored to their needs.
Benefits of a Premium In-Dash Video Installation

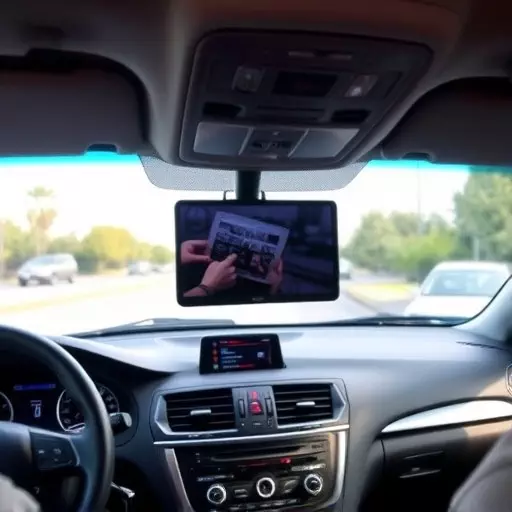
A premium in-dash video setup offers a myriad of benefits that transform your vehicle’s interior into an entertainment hub. Unlike basic infotainment systems, high-end installations provide advanced features like crystal-clear 4K resolution displays, seamless integration with modern smartphones, and support for various multimedia formats. This enhances driving experience by keeping you entertained and connected while on the road.
When comparing DIY in-dash video installation to a professional service, outsourcing to experts has its advantages. Professional installers ensure precision fitting, optimal picture quality, and access to the latest technology. They also handle all necessary wiring and connectivity, eliminating potential risks associated with incorrect installations. Whether you opt for a DIY approach or seek professional assistance, upgrading to a premium in-dash video installation in your Toledo vehicle is an investment that promises to elevate your driving experience.
DIY vs Professional: Weighing Your Options

When considering an in-dash video setup for your vehicle, one of the primary decisions you’ll face is whether to go DIY or professional. Doing it yourself (DIY) can be appealing due to cost savings and the sense of accomplishment that comes with installing something yourself. It’s a chance to customize your car according to your unique needs and preferences. However, DIY installations require specific skills, tools, and knowledge about automotive systems to ensure a safe and secure fit.
On the other hand, professional installation offers peace of mind. Expert technicians have extensive experience in dealing with various vehicle makes and models, ensuring that your in-dash video system is not only correctly installed but also optimized for your car’s electrical system. While it may come at a higher cost, professional services can save you from potential issues like incorrect wiring, poor image quality, or even voiding your warranty. Choosing the right path depends on your comfort level with DIY projects and your willingness to invest in expert craftsmanship for a premium experience.
Choosing the Right Equipment for Your Vehicle

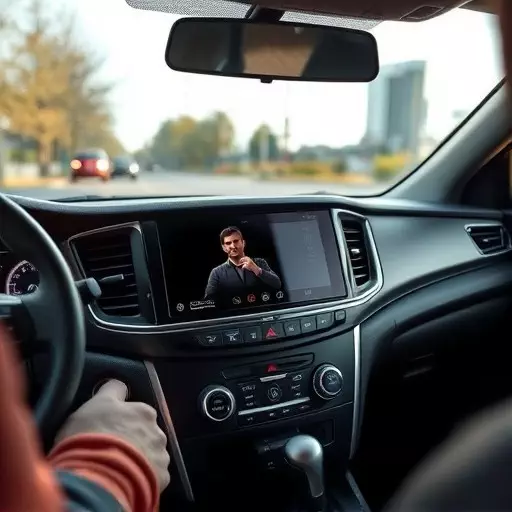
When it comes to installing a premium in-dash video setup in your vehicle, choosing the right equipment is half the battle won. The first step is to assess your needs and preferences. Consider factors such as screen size, resolution, and functionality. For example, if you’re a tech enthusiast, you might opt for a high-definition touchscreen with advanced features like Apple CarPlay or Android Auto integration. Alternatively, if budget is a concern, there are cost-effective options that still offer decent picture quality and essential connectivity.
Next, ensure compatibility with your vehicle’s make and model. Different cars have varying dash layouts and mounting options for in-dash units. You can opt for a DIY in-dash video installation if you’re comfortable with technical tasks and have the right tools. However, for those who prefer a hassle-free experience or want to ensure the job is done correctly, professional in-dash video installation services are available. These experts will not only source the appropriate equipment but also handle the precise cutting and fitting required to seamlessly integrate your new setup into your vehicle’s dashboard.
Step-by-Step Guide to Installing an In-Dash Video System (DIY)

Installing an in-dash video system yourself can seem daunting, but with a step-by-step approach and the right tools, it’s a manageable DIY project for car enthusiasts. Here’s your go-to guide for a successful installation:
1. Plan Your Setup: Start by choosing the perfect in-dash unit for your vehicle, considering screen size, features, and compatibility. Measure the space available in your dashboard to ensure a snug fit. Gather all necessary components, including cables, adapters, and mounting hardware specific to your car model.
2. Prepare Your Vehicle: Begin by power-washing and drying your dashboard to ensure a clean surface. Remove any existing audio or video equipment. Create a temporary power source for the in-dash unit if needed, as some systems require it during installation. Create a clear path for cables by carefully routing them through pre-drilled holes or existing crevices, ensuring they’re secured and protected.
Common Challenges and How to Overcome Them

Many car owners consider installing an in-dash video setup a worthwhile upgrade for their vehicles, enhancing entertainment and navigation. However, the process can present several challenges, especially for those attempting a DIY in-dash video installation Toledo. Common obstacles include finding the right equipment compatible with their vehicle’s make and model, ensuring proper fitting without damaging the dashboard, and integrating the system seamlessly with existing features like audio and navigation.
To overcome these challenges, it is often recommended to seek guidance from professionals or thoroughly research compatible options specific to their vehicle. Additionally, utilizing tools designed for precise installation and following detailed tutorials can significantly improve success rates. For those opting for professional in-dash video installation, a certified technician ensures accurate fitting, optimal performance, and personalized adjustments, addressing potential issues before they arise.
Maintenance and Upgrades: Ensuring Longevity of Your Setup

Maintaining and upgrading your in-dash video setup is crucial for longevity and optimal performance. A DIY in-dash video installation in Toledo can be a rewarding experience, but regular care is essential. Keeping components clean, inspecting connections for corrosion or damage, and updating firmware when new versions are released by the manufacturer can significantly extend the lifespan of your system. Additionally, upgrading to newer models with advanced features like 4K resolution, HDR, and enhanced audio capabilities ensures you stay ahead of technological advancements.
For those who prefer a hands-off approach, professional in-dash video installation services offer peace of mind. Expert technicians can provide tailored solutions, ensuring components are securely mounted and wired correctly. They also stay updated with the latest technology, allowing car owners to experience the best that automotive entertainment systems have to offer. Regular maintenance by professionals includes cleaning lenses, calibrating displays, and testing audio-visual performance, guaranteeing a seamless viewing experience for years to come.